
Homework 0: Setup
Start on Sep 8 | Due on Sep 17 With grace days Sep 19
Setup on Coursys
Find a group to work with for the homework assignments and the final course project. The group size is 3 people or less. Single person groups are allowed. We will be checking that all group members are contributing equally to the homework submission and the final project.
Along with your group members, register yourself as part of a group on Coursys.
Create a memorable name for your group. If you need help, seek help. Make sure there is no whitespace in your group name or anything that might cause a mojibake (please use plain ascii).
Important: Do not use any obscene words in your group name. Be mature about your choice of group name. That does not mean it cannot be funny, just be aware that your choice of group name may offend someone else so be considerate of others.
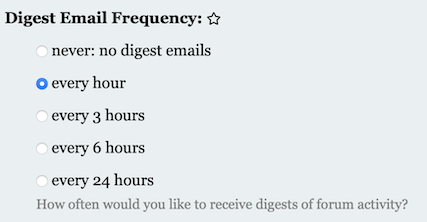
Go to the Course Discussion Page and select [Activity Digest].
Change the Digest Email Frequency: to a setting that send you email notifications, like so:
Setup Git Repository
Git Basics
In this course, your programs will be managed and archived using Git. The basic idea is as follows:
- Every student and group gets a private storage area called a repository on the SFU server machines, or “repo” for short.
- Your code is stored in your repo. Every time you make a change to your code, you commit a new revision of your code to the repo for permanent storage. All revisions you ever commit are kept, and you can retrieve any committed revision any time. This means you have a combined backup and means to undo any changes you ever make. This is how software engineers manage their code projects.
Create new repository on SFU Github Enterprise
Decide in your group the person that will create the repository on SFU Github Enterprise and invite the other group members as a Developer with write/admin permissions. The main maintainer in the group should follow the instructions in this section.
Go to SFU Github Enterprise and log in with your SFU username and password, the same one you use to check your e-mail on the SFU Outlook mail server. You should enable 2FA if you have not done so already and also go through the 2FA authentication.
Once logged in, you will see a list of your existing repos if you
have created any in the past. Create a new Private repository for
this class by clicking the New Repository button (if this is your
first repository on SFU Github) or the New button to create a new
repository for the homework assignments for this course.
On the Create a new repository page, select a Repository name.
You must name your repo: nlpclass-1257-g-GROUP where
GROUP is the group you registered on Coursys (see above).
For example, a repository name might be nlpclass-1257-g-ethicsgradient.
Make sure you add the g- before your group
name. It is important to name the repo exactly as you see here.
Write an optional Description.
Important: You must choose this repository to be
Private. We will not accept any repository for the homeworks in this course that is marked asPublic. Your repo must be visible only to yourself and your group members. You must not give access to your repo to any other students except your group members, the TA(s) and the instructor..
Plagiarism is a serious academic offense.
At any point in the future you are also not allowed to either mark this repository as Public or copy the code to a different public repository (on Github or elsewhere).
The other initialization choices are optional (there is more about
setting up your .gitignore file below).
Then click on the Create repository button.
Your repo has now been created. You will be taken to the web page for your newly created repo.
Add the instructor and TA as Developers
This is the most important step in the setup of your GitHub repository
The course instructor and the TAs need access to your repo in order to test
and grade your code. Add the instructor and TAs as a member of your
repo by clicking on the Settings menu and choosing Add People which looks like this:
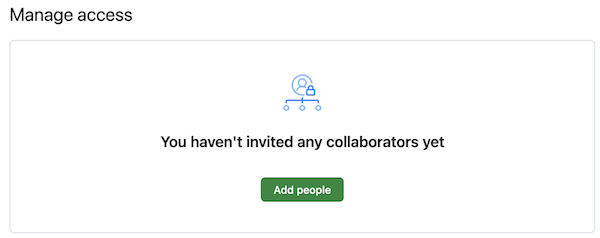
On the page that loads up type in (or individually copy/paste) each of the
following list of names: anoop,jgd5,eja42,wta55,and invite them as a Collaborator.
Set up notifications
You should be automatically set up to “Watch” changes to your repository, but ensure that you are watching changes.
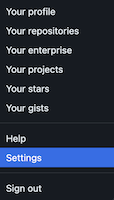
Set up your notifications by going to your personal settings accessed through your user icon on the upper right corner:
Then select Notifications (with the bell icon) and make
sure you are notified about changes to the repository:
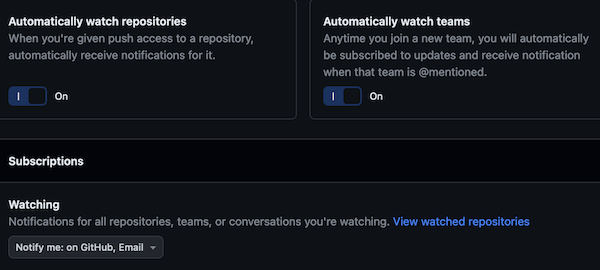
Make sure you are notified about Github Issues.
Setup SSH Key
Next we will set up the Secure Shell (ssh) keys so you can access your repo without a password. If you do not already have an SSH key then first generate a new ssh key.
If you have set up your SSH key correctly then you will have a public key. View it
cat ~/.ssh/id_*.pub
Then add your public SSH key to the GitHub server using these instructions. .
Clone your Repository
Download a copy of your repo to your CSIL machine. The action of making a local copy of your online repo is known as a “clone”.
In the terminal window, enter the commands
git config --global user.name USER
git config --global user.email USER@sfu.ca
git config --global core.editor nano         # or set it to your favourite editor
git config --global push.default current
cd $HOME
git clone git@github.sfu.ca:GROUPUSER/nlpclass-1257-g-GROUP.git
where USER is your SFU username, GROUPUSER is the SFU username of
the person who created the group repository and GROUP is the name of the
group you have already setup on Coursys. If
you skipped any of the above steps in setting up your GitHub repo
this command will not work. The system might prompt you for a
username/password combo. Supply the usual answers. To avoid entering
your username/password over and over again you can set up passwordless
ssh.
Your repo will be cloned into a new directory (also known as a folder)
called nlpclass-1257-g-GROUP.
Create your Homework 0 directory
After cloning your repository, make sure you are inside your repository and at the top level. Create a directory for Homework 0:
mkdir hw0
cd hw0
pwd
When you print your working directory it should look like this:
nlpclass-1257-g-GROUP/hw0
Add a file README.md to this directory using your favourite editor
and then git add README.md and git commit -m "Initial hw0 commit"
and then git push to send your new directory and file to the
GitHub server. Open up GitHub on a web browser to check that you
can see hw0/README.md in your repository on the web browser.
Add a .gitignore file at the top level of your git repository
to avoid committing and pushing useless files to the GitHub
server. Here is a typical .gitignore file.
venv
__pycache__
.DS_Store
*.egg-info
.ipynb_checkpoints
Python 3 Notebooks
We will be using Python 3 notebooks for development, but you will be submitting a self contained Python 3 program that can be run on the command line as well.
First set up a virtual environment to contain all the dependencies you need to run a Python3 notebook. To use virtualenv to manage dependencies, first setup a virtualenv environment:
python3 -m venv venv
source venv/bin/activate
pip3 install -U -r requirements.txt
The file requirements.txt should minimally have the following
contents.
pip
wheel
notebook
jupyter_contrib_nbextensions
jupyter_nbextensions_configurator
You can add more requirements by creating your own requirements.txt
file in the answer directory of each homework. Typically for
each homework you will add any additional software package requirements
you need into the requirements.txt file. These packages should
be already available on CSIL machines so the venv should not use
up too much disk space if you are using a CSIL machine.
If you have trouble, sometime clearing the pip cache helps. Remove
the contents of ~/.cache/pip before the pip install.
Run jupyter notebook:
jupyter notebook
Read the jupyter documentation and get used to editing a notebook with a combination of markdown and Python code.
Task: Segmentation into Words
Homework 0 is mainly to set up your groups and programming environment for this course for the semester, but to complete this homework you have to submit the solution to the following task as your submission for Homework 0. It will serve as a guide for the steps to be taken for all subsequent homeworks in this course.
The sample task for this homework is to automatically segment English input that does not have word boundaries into the most plausible sequence of words.
Submission for each homework will be done on Coursys.
Getting Started
Get started:
git clone https://github.com/anoopsarkar/nlp-class-hw.git
cd nlp-class-hw/ensegment
Clone your repository if you haven’t done it already:
git clone git@github.sfu.ca:USER/nlpclass-1257-g-GROUP.git
Then copy over the contents of the ensegment directory into your
hw0 directory in your repository.
Set up the virtual environment:
python3 -m venv venv
source venv/bin/activate
pip3 install -r requirements.txt
Note that if you do not change the requirements then after you have
set up the virtual environment venv you can simply run the following
command to get started with your development for the homework:
source venv/bin/activate
Background
Given a URL: choosespain.com what is this website about?
You might guess one of the following alternatives:
choose spainchooses pain- etc.
Categorizing the website correctly involves segmenting the domain name correctly into the right sequence of words.
A similar situation arises in Twitter hashtags. What does
the hashtag nowthatcherisdead refer to? Again there
are some very different alternatives depending on the
segmentation:
now thatcher is deadnow that cher is dead
Your task is to use simple word counts to segment such examples into the most likely sequence of words.
Default solution
The default solution is provided in default.py. To use the default
as your solution:
cp answer/default.py answer/ensegment.py
cp answer/default.ipynb answer/ensegment.ipynb
python3 zipout.py
python3 check.py
Make sure that the command line options are kept as they are in
default.py. You can add to them but you must not delete any
command line options that exist in default.py.
Submitting the default solution without modification will get you zero marks.
The default solution scores each possible word segmentation. Each segmentation is scored based on the probability of the words that occur in that segmentation. If input is a sequence of characters (without word boundaries): \(c_0, \ldots, c_n\).
Let us define a word as a sequence of characters: \(w_i^j\) is a word that spans from character \(i\) to character \(j\). So one possible word sequence is \(w_0^3 w_4^{10} w_{11}^n\). We can score this sequence using word probabilities.
$$\arg\max_{w_0^i, w_{i+1}^j, \ldots, w_{n-k}^n} P_w(w_0^i) \times P_w(w_{i+1}^j) \times \ldots \times P_w(w_{n-k}^n)$$
The unigram probability \(P_w\) is constructed using the data
in count_1w.txt. The model is simple but the
search is over all possible ways to form word sequences for the
input sequence of characters. The argmax over all such sequences
will give you the baseline system. The \(\arg\max\) above can be computed
using the following recursive search over \(segment(c_0, \ldots, c_n)\):
$$\begin{eqnarray} segment(c_i, \ldots, c_j) &=& \arg\max_{\forall k <= L} P_w(w_i^k) \times segment(c_{k+1}, \ldots, c_j) \\ segment(\emptyset) &=& 1.0 \end{eqnarray}$$
where \(L = min(maxlen, j)\) in order to avoid considering segmentations of very long words which are going to be very unlikely. \(segment(\emptyset)\) is the base case of the recursion: an input of length zero, which results in a segmentation of length zero with probability \(1.0\).
To speedup the search, the default solution uses memoization of each \(segment\) in order to avoid the slow exploration of the exponentially many segmentations.
The Challenge
Your task is to improve the accuracy on this task as much as possible. The definition of accuracy is provided below. You cannot use any external data sources or any other toolkits. You can get a much higher accuracy by adding one simple function (one line of code) to the default solution provided to you. However this one line of code is not trivial. You should approach this challenge based on a careful examination of the source code of the default solution and the output of the default solution on the various inputs.
Background Reading
Read the following book chapter by Peter Norvig:
Just read the chapter for more insights into the challenge. Do not use any additional data available on the above page.
Data files
The data files provided are:
data/count_1w.txt– counts taken from the Google n-gram corpus with 1TB tokensdata/input– input filesdev.txtandtest.txtdata/reference/dev.out– the reference output for thedev.txtinput file
Required files
You must create the following files:
answer/ensegment.py– this is your solution to the homework. start by copyingdefault.pyas explained below.answer/ensegment.ipynb– this is the iPython notebook that will be your write-up for the homework.
Run your solution on the data files
To create the output.zip file for upload to Coursys do:
python3 zipout.py
For more options:
python3 zipout.py -h
Check your accuracy
To check your accuracy on the dev set:
python3 check.py
The score reported is F-score which combines precision and recall into a single score.
For this homework, tp (true positives) is defined as the words that were found in the output that exist in the reference. If a word occurs in the output but not in reference it is counted as a fp (false positive) and vice versa is counted as a fn (false negative). Precision \(p\) is defined as \(\frac{tp}{tp+fp}\). Recall \(r\) is defined as \(\frac{tp}{tp+fn}\).
F-score is defined as \(2 \cdot \frac{p \cdot r}{p + r}\).
For more options:
python3 check.py -h
In particular use the log file to check your output evaluation:
python3 check.py -l log
The output you will see is the score on the dev set:
$ python3 check.py
dev.out score: 0.82
The accuracy on data/input/test.txt will not be shown. We will
evaluate your output on the test input after the submission deadline.
The default solution gets a very poor F-score on the test set (again, you cannot see the test set score based on what is provided to you):
$ python3 check.py
dev.out score: 0.82
test.out score: 0.13
Using a single line function added to the default solution with no change to the input data files should get you remarkably higher F-score on both dev and test:
$ python3 check.py
dev.out score: 0.98
test.out score: 0.97
Submit your homework on Coursys
Once you are done with your homework submit all the relevant materials to Coursys for evaluation.
Create output.zip
Once you have a working solution in answer/ensegment.py create
the output.zip for upload to Coursys using:
python3 zipout.py
Create source.zip
To create the source.zip file for upload to Coursys do:
python3 zipsrc.py
You must have the following files or zipsrc.py will complain about it:
answer/ensegment.py– this is your solution to the homework. start by copyingdefault.pyas explained below.answer/ensegment.ipynb– this is the iPython notebook that will be your write-up for the homework.
In addition, each group member should write down a short description of what they
did for this homework in answer/README.username.
Upload to Coursys
Go to Homework 0 on Coursys and do a group submission:
- Upload
output.zipandsource.zip - Make sure you have documented your approach in
answer/ensegment.ipynb. - Make sure each member of your group has documented their contribution to this homework in
answer/README.usernamewhereusernameis your CSIL/GitHub username.
Grading
The grading is split up into the following components:
- Group setup done on Coursys.
- GitHub setup including adding instructor and TA as Developer to the repository.
- dev scores (see Table below)
- test scores (see Table below)
- iPython notebook write-up
- Check if each group member has a
answer/README.username.
Your F-score should be equal to or greater than the score listed for the corresponding marks.
| F-score(dev) | F-score(test) | Marks | Grade |
| .82 | .13 | 0 | F |
| .84 | .50 | 55 | D |
| .85 | .55 | 60 | C- |
| .87 | .60 | 65 | C |
| .89 | .70 | 70 | C+ |
| .91 | .75 | 75 | B- |
| .93 | .80 | 80 | B |
| .95 | .85 | 85 | B+ |
| .97 | .90 | 90 | A- |
| .98 | .95 | 95 | A |
| .99 | .97 | 100 | A+ |
The score will be normalized to the marks on Coursys for the dev and test scores.